Choosing the right Adhesive Sealant starts with the joint, not the tube. What materials must it bond? How much movement will the joint face? Will it meet rain, sunlight, cleaning chemicals, or temperature swings? A bead joining glass to aluminum on a sunlit façade has different demands from one sealing a bathroom joint. Small details matter.
The market is growing, but growth does not make every product suitable. MarketsandMarkets estimated the global adhesives and sealants market at USD 76.1 billion in 2023, with a projected value of USD 93.6 billion by 2028. These figures describe a broad category, not a recommendation for any one project. Adhesion specialist Dr. Steven Abbott’s work highlights a useful principle: “Adhesion is a property of the system, not just the adhesive.” In practice, surface preparation, material compatibility, joint design, and curing conditions all affect performance. Check the technical data sheet. Then check whether its test conditions resemble your real application.
There is no universal best choice. A product may bond strongly yet fail when a joint stretches or stays damp. That detail is easy to miss. This guide compares common sealant chemistries, explains key selection factors, and shows what to verify before application. It also leaves room for uncertainty: real substrates can vary, and a small on-site test may reveal problems that a data sheet cannot.
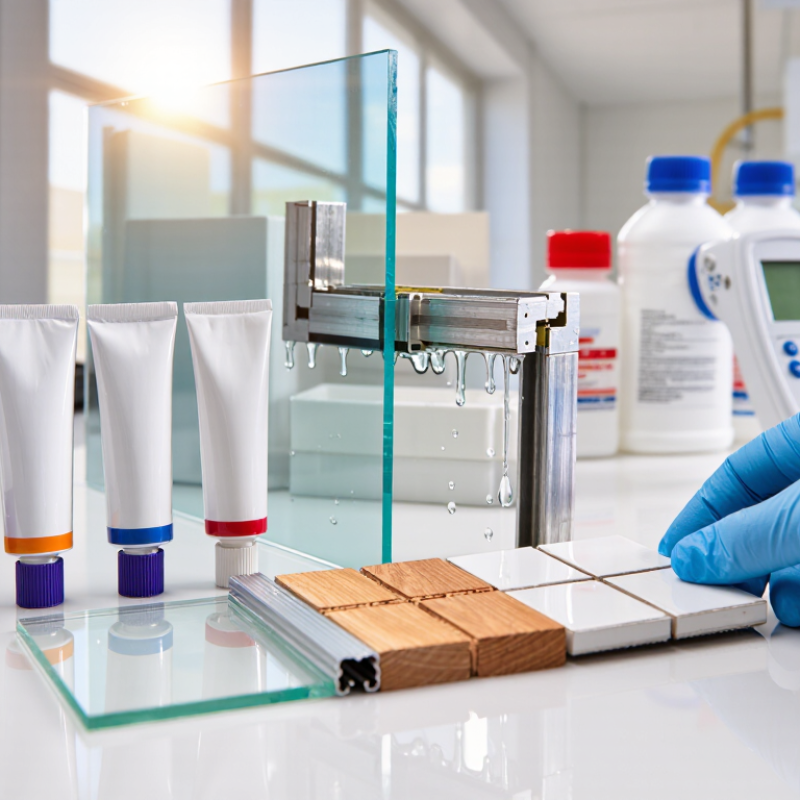
Choosing an adhesive sealant starts with the surfaces it must bond. Concrete, glass, painted metal, and plastic each present different challenges. Dust, oil, moisture, and old coatings can weaken adhesion, even when the product appears suitable. Check the technical data sheet for approved substrates and preparation steps. Then consider movement, temperature, water exposure, and sunlight. A joint beside a sunny window may heat and expand, while a bathroom joint faces repeated moisture. ASTM C920 classifies elastomeric joint sealants by movement capability; Class 25 and Class 50 indicate different movement ratings. This standard is a useful reference, but it does not prove that a sealant will bond to every surface.
Tips: Clean a small test area and let it dry. Test before committing. Check whether primer is required, especially on porous concrete or unusual plastics.
Match the sealant to the actual joint, not just the material names on the package. Measure the gap and estimate how much it may open or close. A rigid adhesive may hold well initially but crack when the joint moves. A flexible sealant may accommodate movement yet provide insufficient structural strength for a load-bearing bond. Read the cure conditions too: cool air, high humidity, or a deep bead can change curing time. Some details are easy to overlook. If the substrate or exposure is uncertain, test adhesion on a hidden area and inspect it after curing. This small check can reveal peeling, discoloration, or poor contact before the full application.
Choosing an adhesive sealant starts with the materials and the conditions around the joint. Silicone sealants handle moisture and temperature changes well, making them useful around sinks, windows, and exterior glazing. They remain flexible, but many types cannot be painted. That matters. Acrylic sealants are easier to paint and clean up, yet they generally suit smaller movements and drier indoor areas better.
Polyurethane sealants often provide strong adhesion and resist abrasion, which can help with floors, roofs, and construction joints. They may need more careful application and longer curing time. Hybrid sealants combine properties from different chemistries, often offering flexibility, adhesion, and paintability in one product. Still, performance varies. Compare the product’s approved substrates, movement rating, exposure limits, and cure time rather than relying on the type name alone. Check the label.
Before application, consider what the joint will face: standing water, sunlight, vibration, or repeated expansion. Clean, dry surfaces improve bonding, while dust or old sealant can lead to early failure. Allow enough time for curing before exposing the joint to water or movement. A small test area can reveal poor adhesion or an unwanted finish. One detail is easy to overlook: the neatest bead is not always the most durable choice.
| Sealant Type | Typical Strengths | Movement Capability | Weather and Water Resistance | Paintability | Common Substrates | Typical Applications | Key Limitations |
|---|---|---|---|---|---|---|---|
| Silicone | Excellent flexibility; good adhesion to many nonporous surfaces; retains flexibility over a broad temperature range. | Often high; some products are rated for approximately ±25% to ±50% joint movement. | Excellent resistance to rain, moisture, UV exposure, and outdoor weathering. | Generally not paintable; paint adhesion is poor. | Glass, glazed tile, aluminum, and other compatible nonporous surfaces. Some grades are formulated for specific plastics or stone. | Glazing, sanitary joints, exterior joints, and weatherproofing. | May not adhere well to porous or oily surfaces without the right grade or primer. Some formulations can stain sensitive stone or corrode certain metals; check product guidance. |
| Polyurethane | Good adhesion and abrasion resistance; often forms a durable, elastomeric joint. | Moderate to high; movement ratings vary by grade, with some products rated around ±12.5% to ±25%. | Generally good once cured; outdoor UV exposure may cause surface discoloration or chalking in some formulations. | Often paintable after curing, subject to the product instructions and paint compatibility. | Concrete, masonry, wood, and some metals when the surface is prepared as specified. | Construction joints, concrete control joints, panel joints, and general building repairs. | Surface preparation is important. Some products are sensitive to moisture during application, and uncured material may be affected by water. |
| Silane-Modified Polymer (SMP/MS Polymer) | Combines flexible sealing with useful adhesion; many grades are low-odor and formulated without isocyanates. | Moderate to high; the rated movement capability depends on the specific formulation. | Typically good resistance to moisture and outdoor exposure; performance varies by product. | Many grades are paintable, but a compatibility test is recommended. | Commonly used on concrete, wood, metals, glass, and some plastics, subject to product-specific compatibility. | Building joints, façade and roof details, general bonding, and sealing where a paintable flexible joint is needed. | Not every grade bonds to every plastic or coated surface. Cure rate and paint compatibility vary; follow the technical data sheet. |
| Acrylic (Water-Based) | Easy to tool and clean up before curing; useful for interior joints with limited movement. | Low to moderate; often suited to joints with limited movement rather than highly dynamic joints. | Suitable for many interior applications. Standard grades may have limited resistance to prolonged water exposure; water-resistant grades are available. | Usually paintable after the sealant has dried or cured as directed. | Porous materials such as plaster, drywall, wood, and masonry. | Interior trim, skirting boards, and small gaps around doors and windows. | Can shrink during drying and may crack if the joint moves too much. Not the best choice for continuously wet areas unless specifically rated for them. |
| Butyl | Remains tacky or plastic-like in many formulations; offers good water and air sealing in lap joints. | Low; generally intended for joints with little movement rather than elastic expansion joints. | Good resistance to water and weather when protected or used in a suitable joint design. | Usually not paintable; check the product instructions. | Commonly used on metal, glass, and compatible roofing or building materials. | Roofing laps, flashing, glazing bedding, and concealed joints. | May remain soft and collect dirt when exposed. It is not generally intended for high-movement joints or applications requiring a hard, paintable finish. |
| Epoxy Adhesive | High bond strength and rigidity; suitable for structural bonding when the correct system and design are used. | Very low; cured epoxy is generally rigid and is not intended to accommodate significant joint movement. | Can provide good chemical and moisture resistance, depending on the formulation and exposure conditions. | Some cured epoxies can be coated, but compatibility and surface preparation should be verified. | Many metals, concrete, ceramics, and selected rigid plastics, depending on the epoxy system. | Rigid bonding, repairs, and gap filling where movement is minimal. | Typically less flexible than elastomeric sealants. Mixing, working time, cure conditions, and surface preparation are critical. |
Selection note: Properties and movement ratings are typical, not universal. Check the product technical data sheet for the exact formulation, substrate compatibility, joint design, application temperature, and service conditions.
A sealant that grips glass may fail on dusty concrete or coated metal. Check the product’s technical data for approved substrates, primers, and surface preparation. Silicone, polyurethane, and acrylic sealants behave differently, so the material name alone is not enough. Consider whether the surface is porous, oily, painted, or likely to release plasticizers. Clean and dry the joint as directed, then check that old residue will not weaken adhesion. Small details matter.
Test a small area. A simple peel check can reveal poor bonding, but it cannot predict every condition. Also match the sealant to the exposure: direct sunlight, standing water, freeze-thaw cycles, heat, or cleaning chemicals may change its performance. A bathroom joint, for example, faces repeated moisture, while an exterior window may endure UV and wide temperature swings. Allow for joint movement and the stated cure time; a skin on the surface does not mean the sealant has cured through. It is easy to overestimate how forgiving a product will be. When surfaces or conditions are uncertain, make a sample joint and review the technical guidance before committing to the full installation.
The right application method depends on the joint, sealant consistency, and access. A standard caulking gun suits narrow gaps along a window frame or sink. Wider joints may need a larger nozzle and steadier hand pressure. For overhead or awkward areas, check whether the sealant is suitable for that position; a product that slumps can leave thin spots. Read its application instructions, including temperature and curing limits. A small test bead can reveal whether the nozzle size and flow feel manageable.
Preparation matters as much as the bead itself. Remove loose old sealant, dust, grease, and standing water. Use a cleaner compatible with the surface, then let it dry fully. On porous materials, a primer may be needed; on delicate finishes, test first in an inconspicuous spot. Masking both edges helps keep lines neat. For a deep joint, suitable backer material can support the sealant and control its depth. Tool the bead promptly, before a skin forms. I’ve found that rushing this step often leaves uneven edges.
Tips: Cut the nozzle at an angle, starting with a small opening. Keep steady pressure, and smooth the bead in one continuous pass. Don’t assume a dry surface means the sealant has cured. Follow the stated cure time before exposing the joint to water or movement.
Evaluate Safety, Curing Time, and Long-Term Performance
Start with the conditions around the joint, not just the materials being bonded. Check the safety data sheet for ventilation needs, skin protection, and cleanup guidance. A small indoor repair can still involve irritating vapors. Use the recommended gloves, and keep fresh air moving. Also confirm that the sealant suits both surfaces; some formulations bond poorly to oily plastics or dusty masonry.
Curing time affects when a joint can handle water, movement, or load. A surface may feel dry while the material underneath remains soft. Not cured yet. Read the technical data for the stated cure rate, then account for temperature, humidity, and bead depth. A thick bead may need much longer than a thin one. It is easy to rush this step, especially when the surface looks ready.
Long-term performance depends on more than initial grip. Consider exposure to sunlight, standing water, cleaning products, and repeated expansion or vibration. Choose a product rated for those conditions, and prepare the surface as directed. For a costly or critical repair, test a small area first and inspect it after curing. That extra check can reveal weak adhesion, though it cannot perfectly predict years of wear.
WhatsAppOffer Electronics Manufacturing All-in-One
PCBONLINE® is a registered trademark or service mark of pcb online limited or its affiliates.
Copyright © 2001-2024 Pcb Online Limited. All rights reserved